![]() Panasonic Electric Works Networks Co., Ltd. > Support > Setting Examples > VLAN (data + voice) Setting Procedure
Panasonic Electric Works Networks Co., Ltd. > Support > Setting Examples > VLAN (data + voice) Setting Procedure
ここから本文です。
VLAN (data + voice) Setting Procedure
Introduction
This setting example explains the procedure of VLAN (data + voice) setting for switches.
Applicable models
Overview
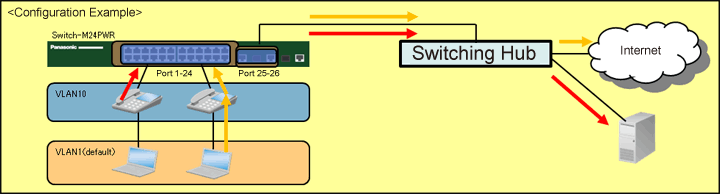
Create VLAN10 for voice on all ports to handle PC (packet without tag) by VLAN1 (default) and voice (packet with VLAN10 tag) by VLAN10.
Configuration Example
Overall setting flow
- 1. Create VLAN group 10 (VLAN ID=10, VLAN Name=IP_Phone, Port Members=1-26).
- 2. Configure QoS to prioritize voice data transmission.
- 3. Confirm that PC (packet without tag) is handled by VLAN1 and voice (packet with VLAN10 tag) by VLAN10 to connect to the Internet and server.
Setting Procedure
Step 1.
Connect the PC and Ethernet switch using a twisted pair cable and console cable, and display the setting screen on Hyper terminal.
(Refer to Setting Example "Ethernet switch Connection Procedure to a Console Port" for the procedure to display the setting screen on the console port)
Step 2.
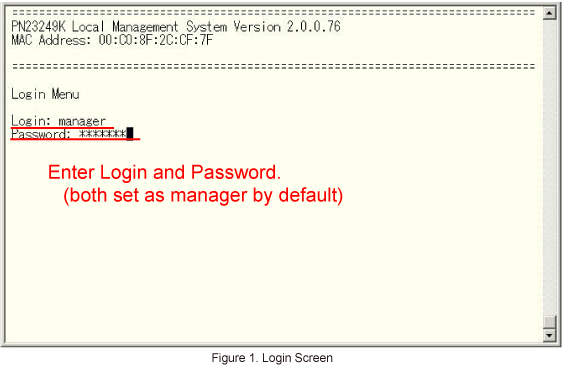
On the login screen, enter Login and Password (both set as manager by default), and login to the setting screen. (Refer to Figure 1)
Step 3.
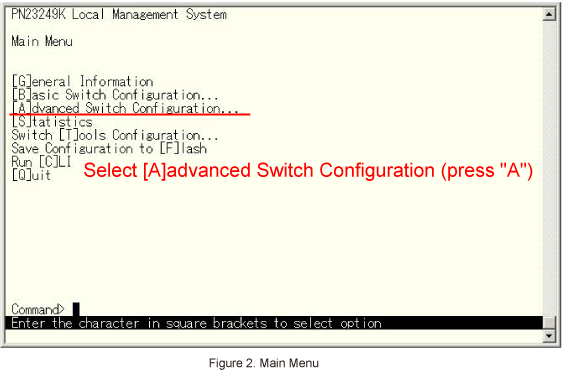
In Main Menu, select [A]dvanced Switch Configuration. (Refer to Figure 2)
Step 4.
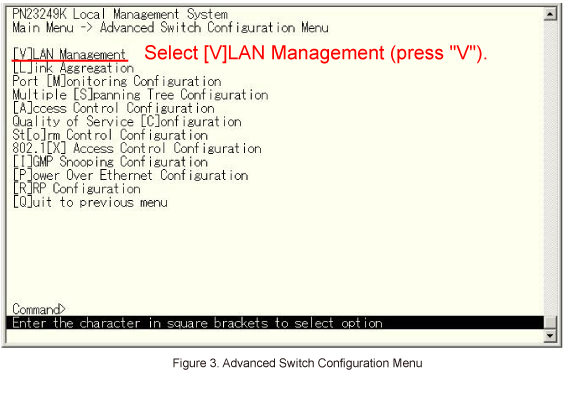
In Advanced Switch Configuration, select [V]LAN Management. (Refer to Figure 3)
Step 5.
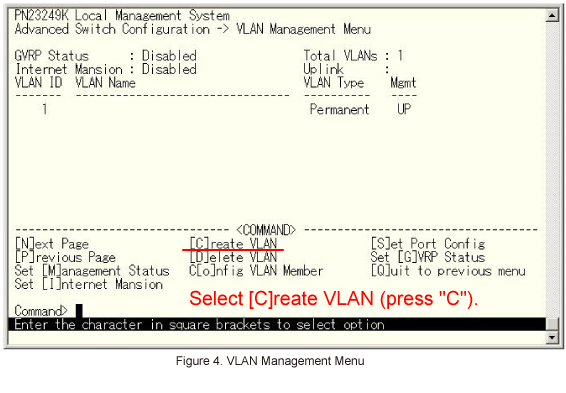
In VLAN Management Menu, select [C]reate VLAN. (Refer to Figure 4)
Step 6.
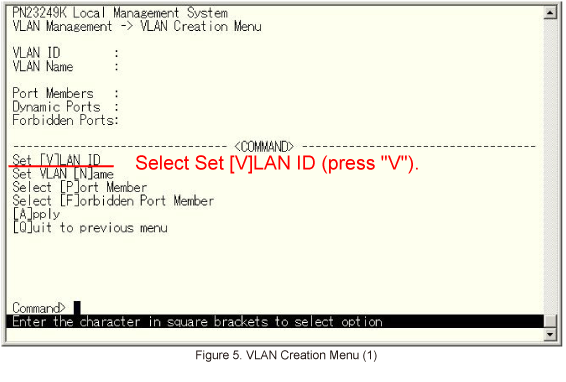
In VLAN Creation Menu, select Set [V]LAN ID. (Refer to Figure 5)
Step 7.
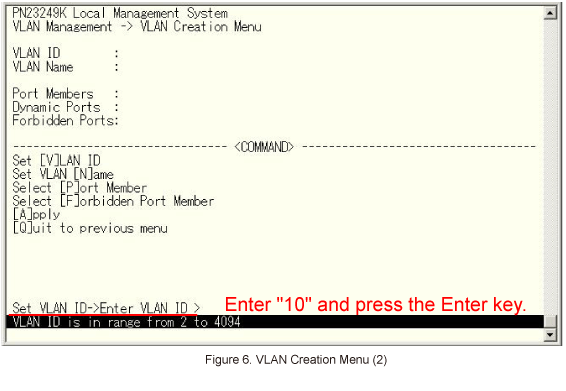
A message similar to one shown in Figure 6 will be displayed. Enter the VLAN ID.
Step 8.
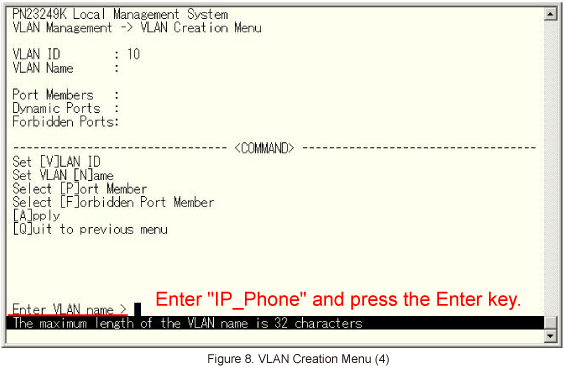
10 is entered as the VLAN ID.Then, select Set VLAN [N]ame on the screen shown in Figure 7.

Step 9.
A message similar to one shown in Figure 8 will be displayed. Enter the VLAN name.
Step 10.
IP_Phone is entered as the VLAN Name.Then, select Select [P]ort Member on the screen shown in Figure 9.
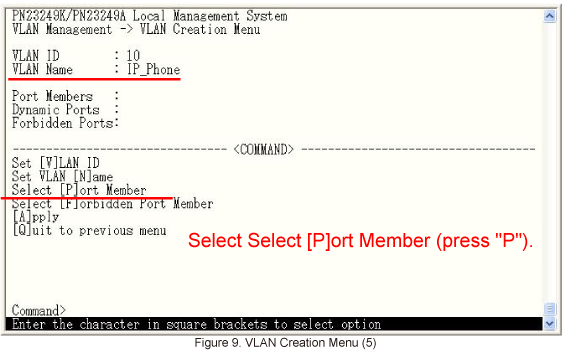
Step 11.
A message similar to the one shown in Figure 10 will be displayed. Select the ports to add as members.
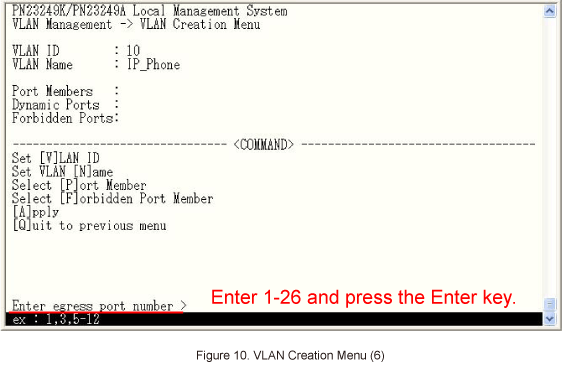
Step 12.
1-26 is entered as Port Members.Lastly, select [Apply] to complete the VLAN creation.
* If Quit to previous menu is selected without executing Apply, no setting will be applied and the display will go back to the previous screen.
Step 13.
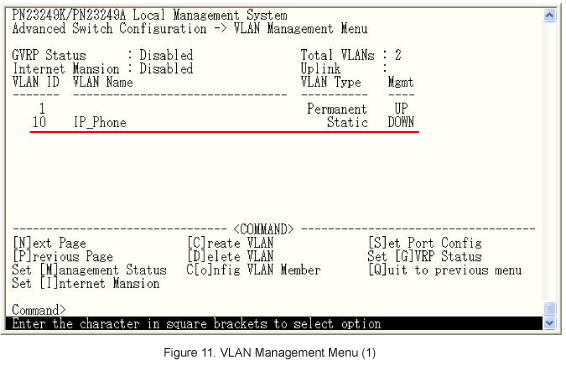
Confirm that VLAN10 (VLAN ID=10, VLAN Name=IP_Phone) is created as shown in Figure 11.
Step 14.
Configure QoS's priority control to prioritize voice data transmission.
* For setting method, refer to the PoE series setting example "QoS Setting Procedure".
Step 15.
After completing the settings, save the settings using Save Configuration to [F]lash.
Step 16.
Connect the devices as shown in the configuration diagram, and confirm that communication is available.
ここからサブメニューです。