ページの先頭です。
ここから本文です。
Login ID/Password Setting Procedure
Introduction
This setting example explains the procedure of Login ID/Password Setting Procedure.
Applicable models
Overview
This procedure is to change Login ID/Password setting of switch.
Configuration Example

Overall setting flow
- 1. Change login ID (default: manager).
- 2. Change password (default: manager).
- 3. Check if you can login with the new login ID and password.
Setting Procedure
Step 1.
Connect the PC and Ethernet Switch using a console cable, and display the setting screen on a terminal emulator such as ZEQUO assist Plus.
Step 2.
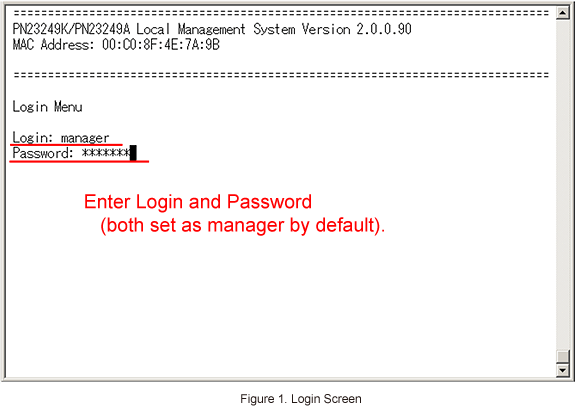
On the login screen, enter Login and Password (both set as manager by default), and login to the setting screen. (Refer to Figure 1)
Step 3.
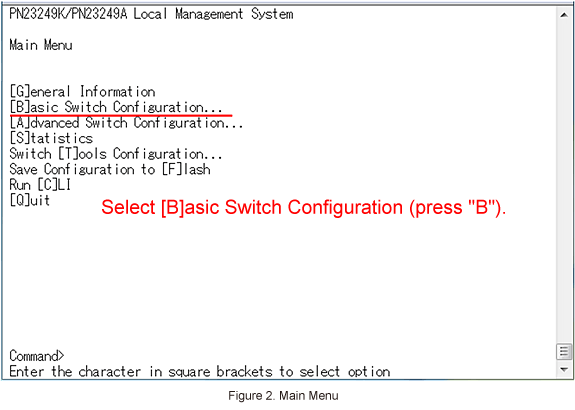
In Main Menu, select [B]asic Switch Configuration. (Refer to Figure 2)
Step 4.
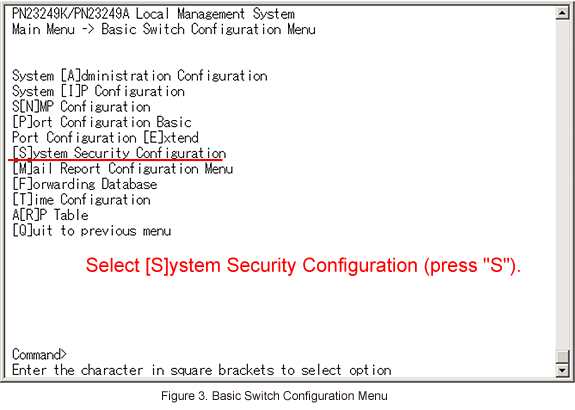
In Basic Switch Configuration Menu, select [S]ystem Security Configuration. (Refer to Figure 3)
*To change the login ID only, skip the following steps 8 and 9.
*To change the password only, skip the following steps 5 to 7.
Step 5.
Change the current login ID.
On System Security Configuration screen, select Change Local User [N]ame.
Enter current password> will be displayed. Enter the current password and press the Enter key. (Refer to Figure 4)

Step 6.
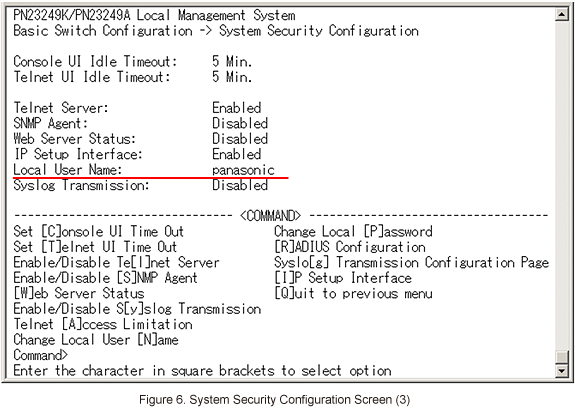
Then, Enter new user name> will be displayed. Enter a new login ID with no more than 12 alphanumeric characters (e.g., panasonic), and press the Enter key. (Refer to Figure 5)

Step 7.
If setting is properly proceeded, the new login ID will be reflected on the screen. (Refer to Figure 6)
Step 8.
Change the current password.
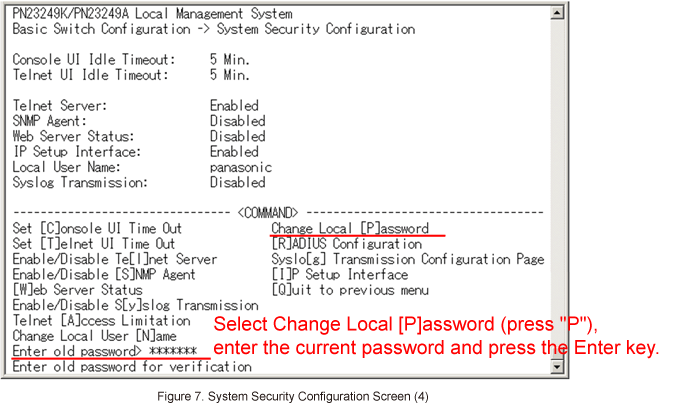
On System Security Configuration screen, select Change Local [P]assword.
Enter old password> will be displayed. Enter the current password and press the Enter key. (Refer to Figure 7)
Step 9.
Enter new password> will be displayed. Enter a new password with no more than 12 alphanumeric characters, and press the Enter key (Refer to Figure 8)
Then, Retype new password> will be displayed. Enter the new password again and press the Enter key.

* The new password will not be displayed on the screen.
Step 10.
Once the changing of login ID/password settings are completed, enter the new login ID/password on the login screen before saving the new settings to make sure if you can login properly . (Refer to Figure 9)

* If you cannot login with the new login ID/password, turn OFF/ON the power so that the settings will return to the previous state unless the settings were saved up to this point. Conduct the settings again from the beginning if you failed to login.
Step 11.
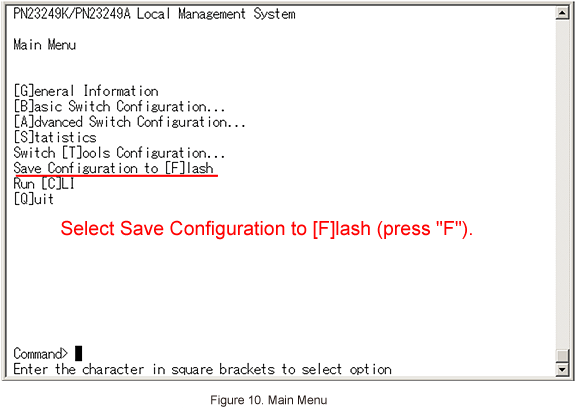
If you can login with the new login ID/password, save the new settings.
In Main Menu, select Save Configuration to [F]lash. (Refer to Figure 10)
Step 12.
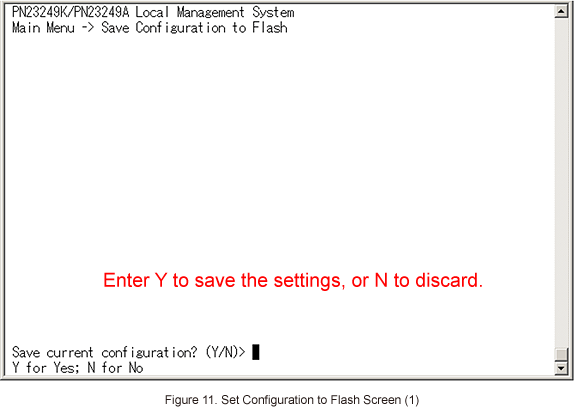
In Save Configuration to Flash screen, Save current configuration? (Y/N)> will be displayed. Enter "Y" to save the settings, or "N" to discard. (Refer to Figure 11)
Step 13.
When "Y" is selected, the saving process will start.
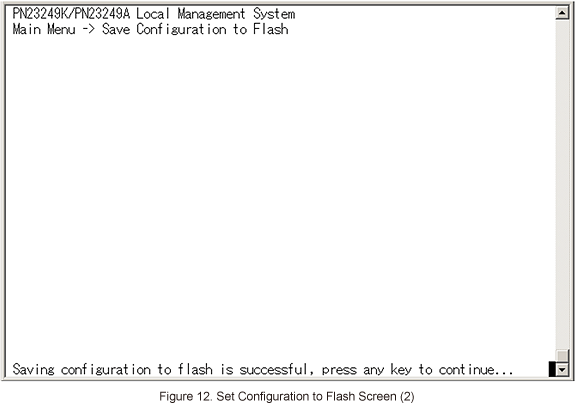
When completed, a message, "Saving configuration to flash is successful, press any key to continue..." will be displayed. Press a key relevant such as Enter.
The screen will return to Main Menu. (Refer to Figure 12)
Now the settings are complete.
ここからサブメニューです。