![]() Panasonic Electric Works Networks Co., Ltd. > Support > Setting Examples > IP Address Setting Procedure
Panasonic Electric Works Networks Co., Ltd. > Support > Setting Examples > IP Address Setting Procedure
ここから本文です。
IP Address Setting Procedure
Introduction
This setting example explains the procedure of the IPv4 address setting for switches.
The IPv4 address can also be set by the IP address easy setting of ZEQUO assist Plus.
(http://panasonic.co.jp/ew/pewnw/english/support/z_assist.html)
Applicable models
Overview
Perform the IP address setting to the switch, to enable communication with the PC to connect to.
Configuration Example (in case of Switch-M24PWR)

Overall setting flow
- 1. Set 192.168.1.254/24 as the IP address for Switch-M24PWR.
- 2. Connect Switch-M24PWR and the PC as shown in the configuration diagram.
- 3. Confirm that Switch-M24PWR can ping the PC.
Setting Procedure
Step 1.
Connect the PC and Ethernet Switch using a console cable, and display the setting screen on a terminal emulator such as ZEQUO assist Plus.
Step 2.
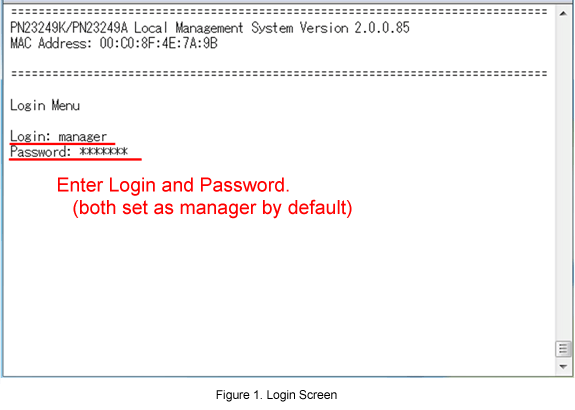
On the login screen, enter Login and PassWord (both set as "manager" by default), and login to the setting screen.
(Refer to Figure 1)
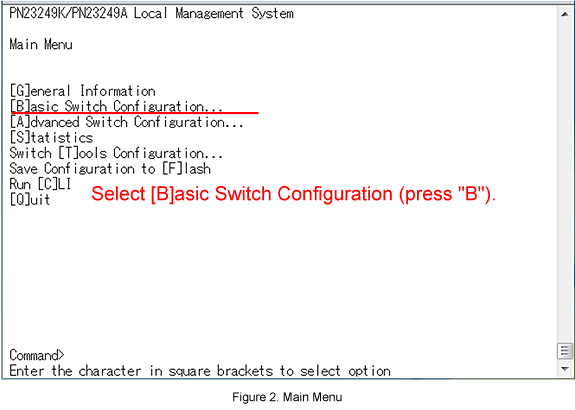
Step 3.
In Main Menu, select [B]asic Switch Configuration. (Refer to Figure 2)
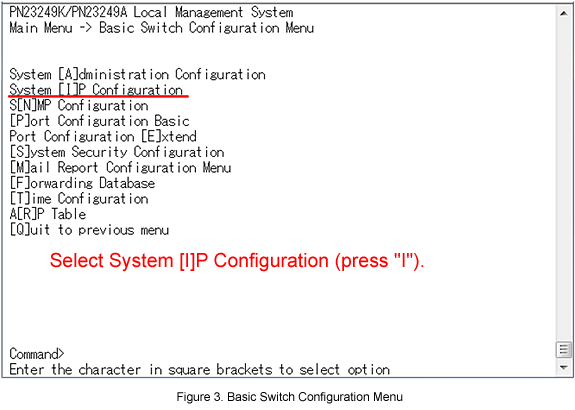
Step 4.
In Basic Switch Configuration Menu, select System [I]P Configuration. (Refer to Figure 3)
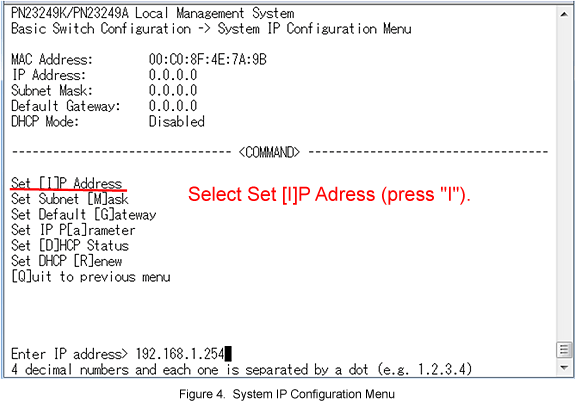
Step 5.
In System IP Configuration Menu, select Set [I]P Address and enter the IP address (192.168.1.254). (Refer to Figure 4)
Step 6.
In System IP Configuration Menu, select Set Subnet [M]ask and enter the subnet mask (255.255.255.0).
Step 7.
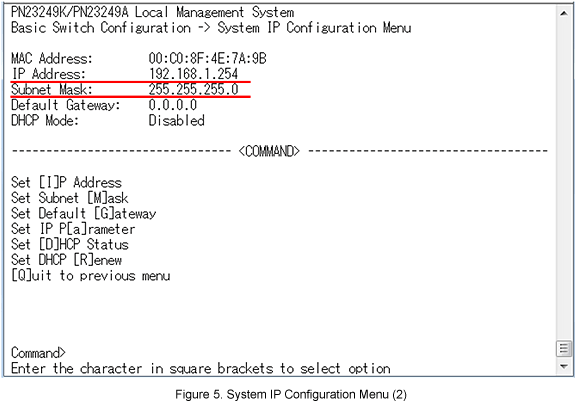
After performing all the settings, confirm that the settings are in the following status. (Refer to Figure 5)
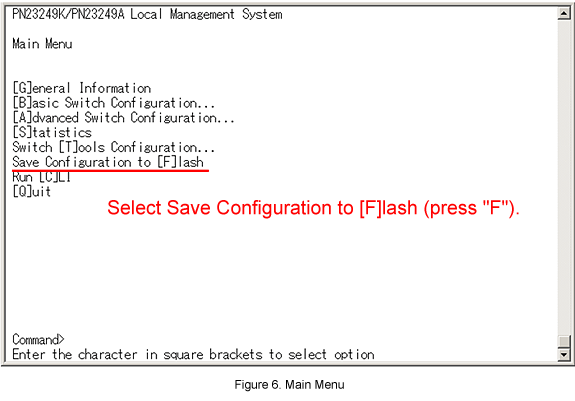
Step 8.
When the settings are complete, go back to the Main Menu by [Q]uit to previous menu, and select Save Configuration to [F]lash to save the settings on the Main Menu. (Refer to Figure 6)
Save current configuration? (Y/N)> will be displayed. enter "Y" to save the settings.
Step 9.
Connect the PC to Switch-M24PWR, and set the IP address for the PC.
Open the command prompt on the PC, Ping to the IP address of Switch-M24PWR, and confirm if there is a reply.
ここからサブメニューです。