ページの先頭です。
ここから本文です。
Storm Control Setting Procedure
Introduction
This setting example explains the procedure of storm control setting for switches.
Applicable models
Overview
For switches, set storm control, suppress the frames occurred during broadcast or multicast storm, and restrict the number of frames transferred to the upper level L3 Ethernet switch.
Configuration Example

Overall setting flow
- 1. Set Switch-M24PWR.
- 1) On port 1, set the number of frames to suppress the storm.
- 2) On port 1, enable the storm control for broadcast.
- 3) On port 1, enable the storm control for multicast.
- 4) On port 1, enable the storm control on DLF (Destination Lost Frame).
Setting Procedure
Step 1.
Connect the PC and Ethernet switch using a twisted pair cable and console cable, and display the setting screen on Hyper terminal.
(Refer to Setting Example "Ethernet switch Connection Procedure to a Console Port" for the procedure to display the setting screen on the console port)
Step 2.
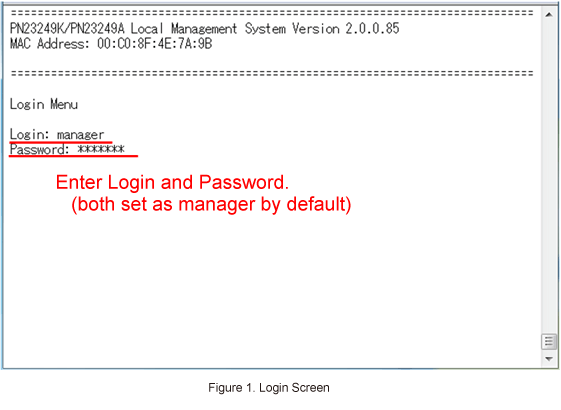
On the login screen, enter Login and Password (both set as manager by default), and login to the setting screen. (Refer to Figure 1)

Step 3.
In Main Menu, select [A]dvanced Switch Configuration. (Refer to Figure 2)

Step 4.
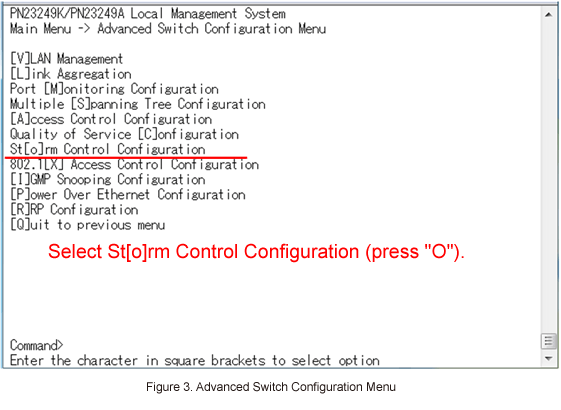
In Advanced Switch Configuration Menu, select St[o]rm Control Configuration. (Refer to Figure 3)

Step 5.
In Storm Control Configuration Menu, select Set [T]hreshold Value and enter port 1. (Refer to Figure 4)

Step 6.
Enter the threshold.(e.g. 100)
* Set the threshold as considering the amount of broadcast, multicast or other traffic on the network that is actually used.
Step 7.
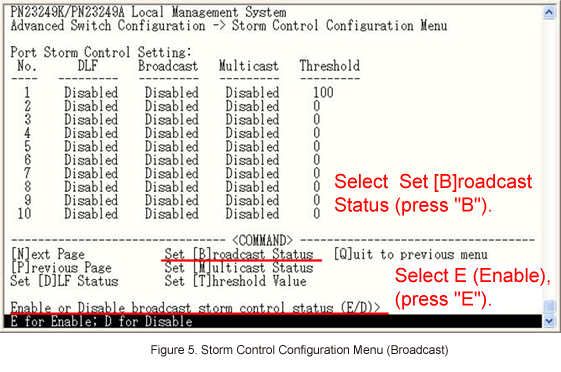
In Storm Control Configuration Menu, Set [B]roadcast Status and enable port 1.

Step 8.
In Storm Control Configuration Menu, select Set [M]ulticast Status and enable port 1.
Step 9.
In Storm Control Configuration Menu, select Set [D]LF Status and enable port 1.
Step 10.
After performing all the settings, confirm that the settings are in the following status.

Step 11.
After completing the settings, save the settings using Save Configuration to [F]lash.
ここからサブメニューです。