ページの先頭です。
ここから本文です。
Configuration Upload/Download Procedure
Introduction
This setting example explains the procedure of the configuration file upload/download for switches.
Applicable models
Configuration Example

* To upload/download the configuration file, TFTP server is required.
Install a TFTP server software on the PC.
Setting Procedure
Step 1.
Connect the PC and the switch using a twisted pair cable and console cable, and display the setting screen on Hyper Terminal.
(Refer to Setting Example "Ethernet Switch Connection Procedure to a Console Port" for the procedure to display the setting screen)
Step 2.
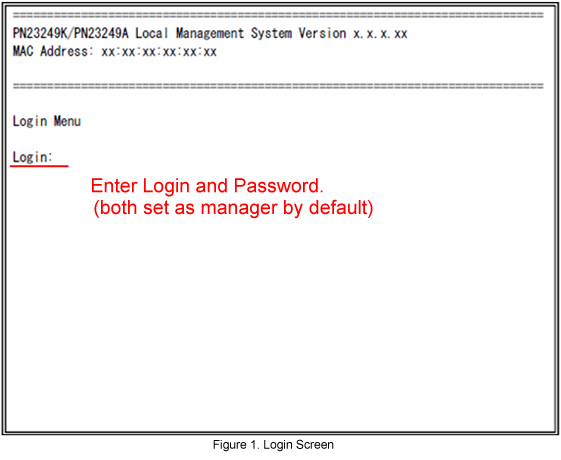
On the login screen, enter Login and Password (both set as manager by default), and login to the setting screen. (Refer to Figure 1)
Step 3.
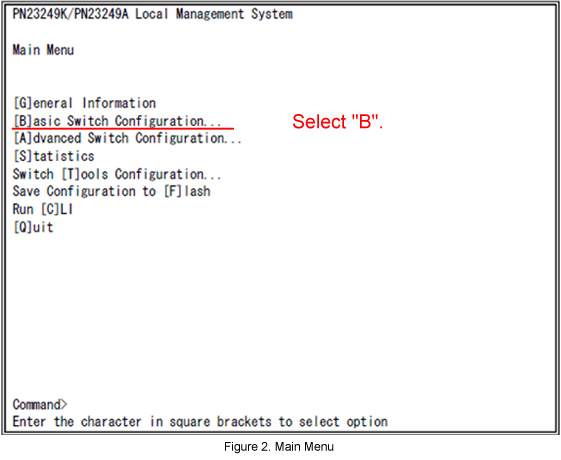
In Main Menu, select [B]asic Switch Configuration. (Refer to Figure 2)
Step 4.
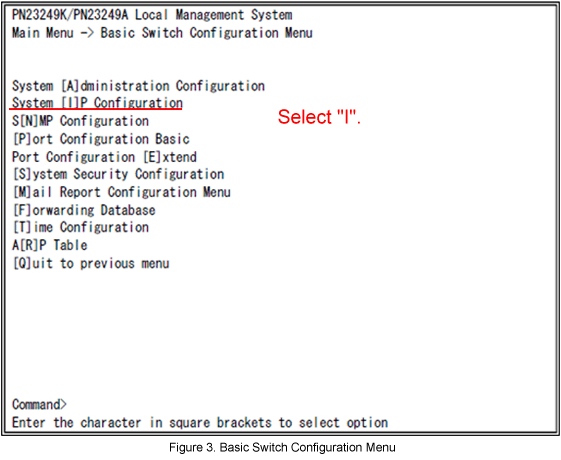
In Basic Switch Configuration Menu, select System [I]P Configuration. (Refer to Figure 3)
Step 5.
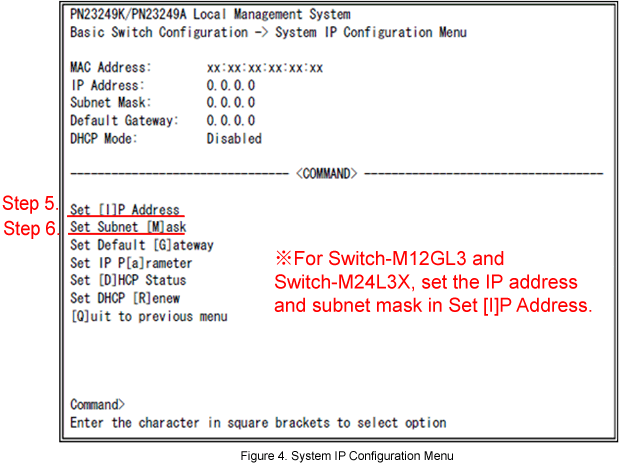
In System IP Configuration Menu, select Set [I]P Address and set the IP address which can communicate with the PC.
Step 6.
Then, select Set Subnet [M]ask and set the subnet mask.
Step 7.
Select [Q]uit to previous menu and go back to Main Menu.
Step 8.
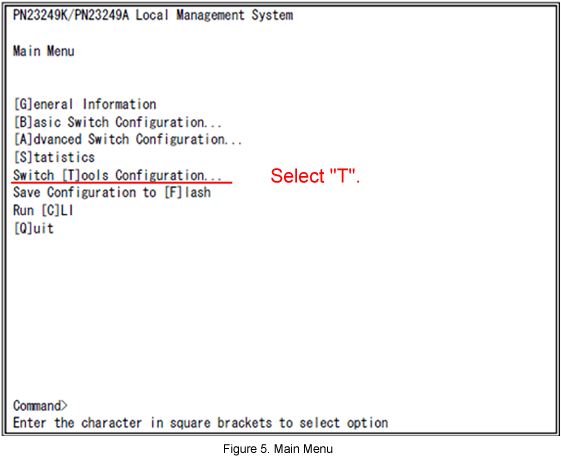
In Main Menu, select Switch [T]ools Configuration.
Step 9.
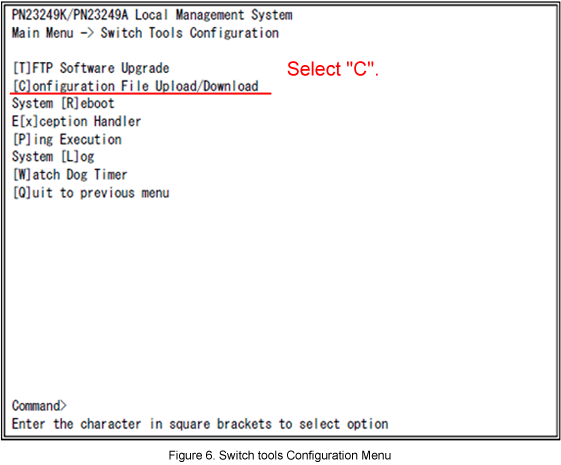
In Switch Tools Configuration Menu, select [C]onfiguration File Upload/Download.
Step 10.
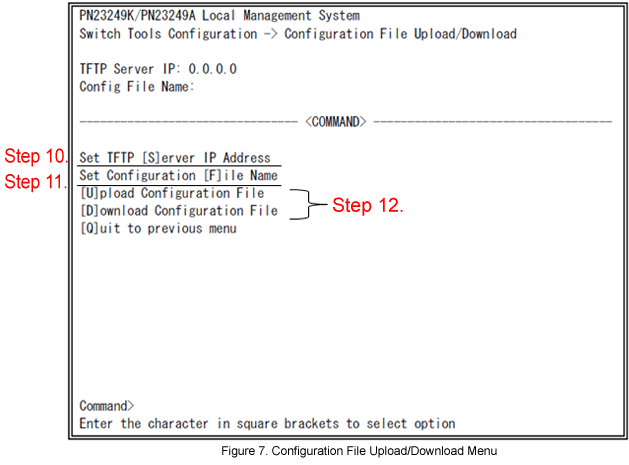
In Configuration File Upload/Download Menu, select Set TFTP [S]erver IP Address and set the IP address of the PC with the TFTP server software installed.
Step 11.
Select Set Configuration [F]ile Name and enter the file name of the configuration file including the extension.
Step 12.
After completing entries to the above 2 items, upload or download of the configuration file by the following commands.
[U]pload Configuration File: When saving the settings for the switch as a configuration file on the PC
[D]ownload Configuration File: When loading a configuration file saved on the PC to the switch
Step 13.
When upload or download of the configuration file is complete, a completion message for each operation will be displayed.
Upload (Download) Successful, press any key to continue
* After downloading the configuration file, please execute the command to save the settings.
ここからサブメニューです。