![]() Panasonic Electric Works Networks Co., Ltd. > Support > Setting Examples > Storm Control Setting Procedure (for WEB)
Panasonic Electric Works Networks Co., Ltd. > Support > Setting Examples > Storm Control Setting Procedure (for WEB)
ここから本文です。
Storm Control Setting Procedure (for WEB)
Introduction
This setting example explains the procedure of storm control setting for switches for WEB.
Applicable models
| Applicable models | |
|---|---|
| Product name | Product number |
| Switch-M24eGLPWR+ | PN28248 |
| Switch-M16eGLPWR+ | PN28168 |
| Switch-M12eGLPWR+ | PN28128 |
| Switch-M8eGLPWR+ | PN28088 |
| Switch-M5eGLPWR+ | PN28058 |
| Switch-M24PWR | PN23249K |
| Switch-M16PWR | PN23169K |
| Switch-M12PWR | PN23129K |
| Switch-M8ePWR | PN27089K |
| Switch-M8esPWR | PN27089N |
| Setting Unit | |
|---|---|
| pps | Mbps |
| ○ | |
| ○ | |
| ○ | |
| ○ | |
| ○ | |
| ○ | |
| ○ | |
| ○ | |
| ○ | |
| ○ | |
Overview
For switches, set storm control, suppress the frames occurred during broadcast or multicast storm, and restrict the number of frames transferred to the upper level L3 Ethernet switch.
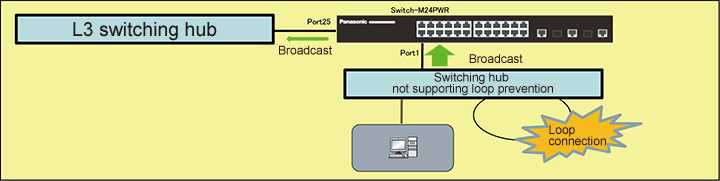
Configuration Example
Setting Flow
- 1. Connect to the Web management screen of Switch-M24PWR.
- 2. Set Switch-M24PWR.
- 1) On port 1, enable the storm control for broadcast.
- 2) On port 1, enable the storm control for multicast.
- 3) On port 1, enable the storm control on DLF (Destination Lost Frame).
- 4) On port 1, set the threshold number of frames (100) to suppress the storm.
- 3. Referring to the configuration example, connect the devices.
- 4. Confirm that the number of packets flowing to the L3 Ethernet switch is being suppressed when a storm occurs by a loop connection.
Setting Procedure
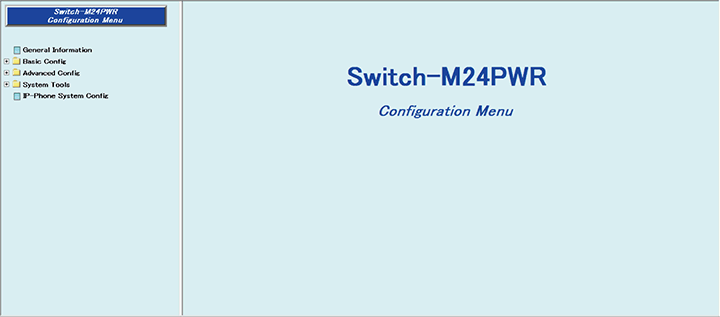
Step 1. Connect to the Web management screen of Switch-M24PWR and login.
Connect the PC and Ethernet switch using a twisted pair cable, and connect to the Web management screen of Switch-M24PWR.
(Refer to setting example "Connection Procedures to Ethernet switch Web Management Screen" for the procedure to connect to the Web management screen)
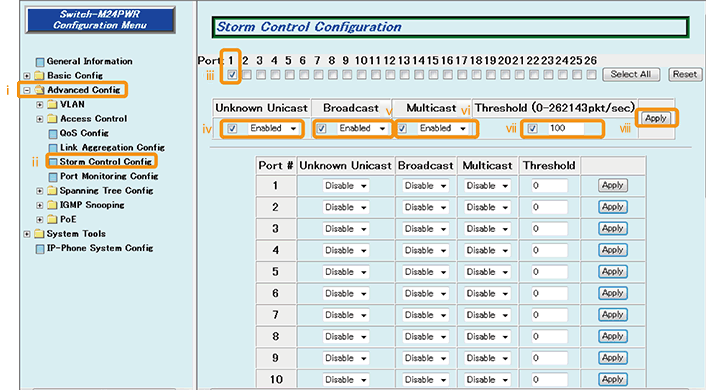
Step 2. On port 1, enable the storm controls of DLF (Unknown Unicast), Broadcast, and Multicast and set a threshold number of frames to suppress the storm.
1) Select “Advanced Config” → ”Storm Control Config” (i → ii).
2) Place a check in “Port:1” (iii).
3) Change ”Unknown Unicast” to “Enabled” and place a check (iv).
4) Change “Broadcast” to “Enabled” and place a check (v).
5) Change “Multicast” to “Enabled” and place a check (vi).
6) Enter “100” in “Threshold” and place a check (vii).
7) Apply the change by “Apply” (viii).
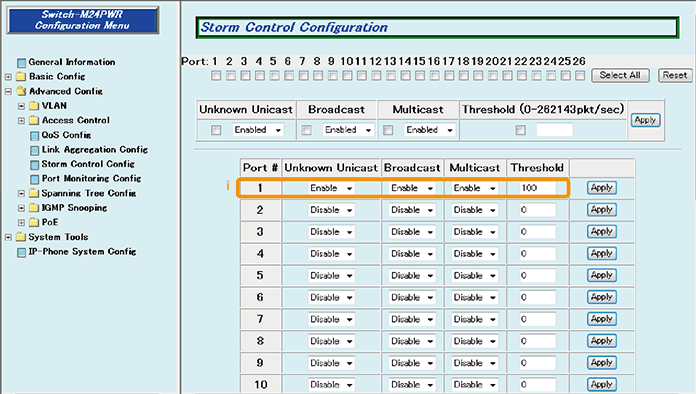
Step 3. Confirm that the changed contents are applied.
Confirm that the settings are in the following status (i).
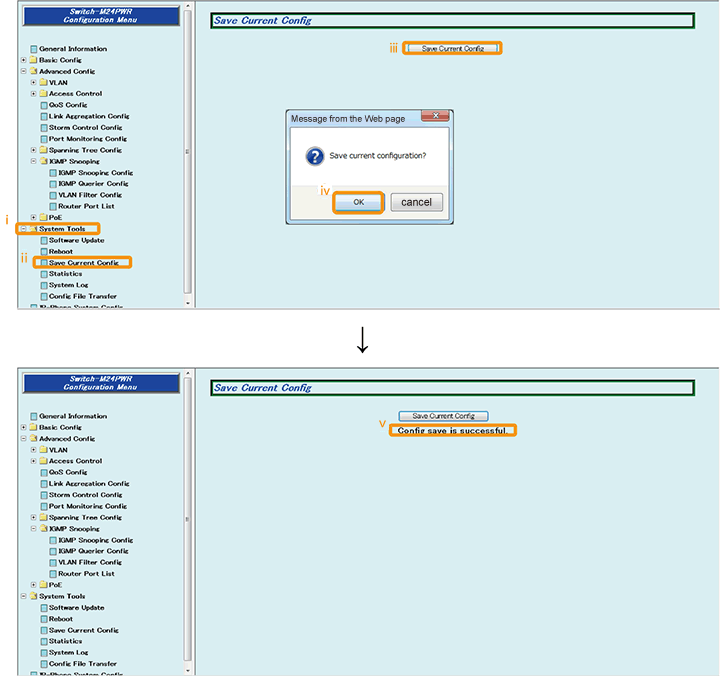
Step 4. Save the settings.
1) Select “System Tools”. → ”Save Current Config”(i → ii).
2) Save the settings by “Save Current Config”(iii).
3) Execute saving by “OK”(iv).
4) Confirm that the settings are saved successfully (v).
Step 5. Connect the devices.
Referring to the configuration example, connect the devices.
Step 6. Execute operation check.
Confirm that the number of packets flowing to the L3 Ethernet switch is being suppressed when a storm occurs by a loop connection.
ここからサブメニューです。