ページの先頭です。
ここから本文です。
Link Aggregation Setting Procedure (ZEQUO Series)
Introduction
This setting example explains the procedure of Link Aggregation setting for ZEQUO Series.
Applicable models
| Applicable models | |
|---|---|
| Product name | Product number |
| ZEQUO 6400 | PN36240E |
| ZEQUO 2200 | PN26241 |
| ZEQUO 2210 | PN26161 |
Overview
Set the link aggregation to ZEQUO 6400-1 Port23 and 24 and ZEQUO 6400-2 Port23 and 24, and extend the communication bandwidth (up to 2 Gbps in this setting).
Configuration Example

Setting content and procedure (common to both ZEQUO 6400-1 and ZEQUO 6400-2)
- Link aggregation for ZEQUO 6400-1 is set to
LACP (Port=23,24 Mode=Active).
- Link aggregation for ZEQUO 6400-2 is set to
LACP (Port=23,24 Mode=Passive).
* When setting the link aggregation using LACP,
set the Ethernet Switch mode to either the combination Active-Active
or Active-Passive
(this function does not work if both sides are Passive).
Overall setting flow
- 1. Set IP Address for ZEQUO 6400-1.
- 2. Set the link aggregation for ZEQUO 6400-1.
- 1) By "create link_aggregation command", create a group to set the link aggregation.
- 2) By "config link_aggregation command", allocate port members to the created port group.
- 3) By "config lacp_port command", set the mode to Active or Passive.
- 4) Save the settings.
- 3. Change the IP address for ZEQUO 6400-2.
- 4. Set the link aggregation for ZEQUO 6400-2.
- 1) By "create link_aggregation command", create a group to set the link aggregation.
- 2) By "config link_aggregation command", allocate port members to the created port group.
- 3) By "config lacp port command", set the mode to Active or Passive.
- 4) Save the settings.
- 5. Connect ZEQUO 6400-1 and ZEQUO 6400-2, and confirm that communication is possible.
Setting Example (Common to both ZEQUO 6400-1 and 2)
Step 1.
Connect the PC and Ethernet Switch using a twisted pair cable and console cable, and display the setting screen on a Hyper terminal. (Refer to Setting Example "Ethernet Switch Connection Procedure to a Console Port" for the procedure to display the setting screen on the console port)
Step 2.
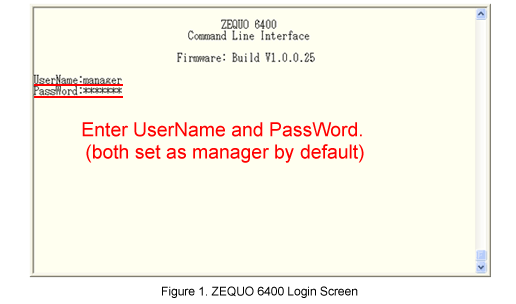
On the login screen, enter UserName and PassWord (both set as "manager" by default), and login to the setting screen. (Refer to Figure 1)

Step 3.
Change the IP address for ZEQUO 6400.
After Z6400:admin#, enter the commands as follows.
Z6400:admin#config ipif System ipaddress 192.168.1.1/24 state enable
When the commands are enter correctly, the following will be displayed.
Command: config ipif System ipaddress 192.168.1.1/24 state enable
Success.
Step 4.
Create a group to set the link aggregation for ZEQUO 6400.
Z6400:admin#create link_aggregation group_id 1 type lacp
Command: create link_aggregation group_id 1 type lacp
Success.
Step 5.
Add port members to the group created in Step 4.
Z6400:admin#config link_aggregation group_id 1 master_port 24 ports 23-24 state enable
Command: config link_aggregation group_id 1 master_port 24 ports 23-24 state enable
Success.
Step 6.
Set the LACP type for the port members created in Step 5.
Z6400:admin#config lacp_port 23-24 mode active
Command: config lacp_port 23-24 mode active
Success.
Step 7.
When all the settings are complete, save the settings.
Z6400:admin#save
Command: save
Saving all configurations to NV-RAM.......... Done.
Step 8.
Similarly, set the IP address (192.168.1.2/24) and the link aggregation to ZEQUO 6400-2, and when the settings are complete, save the settings.
* As for ZEQUO 6400-2, since Lacp_mode is set to Passive by default, only steps 3 to 5 are required.
Step 9.
When the settings for ZEQUO 6400-1 and ZEQUO 6400-2 are complete, connect them referring to the configuration example and perform communication test.
- Confirm that the connection is not looped.
- Confirm that communication is possible even after removing a cable on one side.
ここからサブメニューです。