ページの先頭です。
ここから本文です。
802.1X Port Based Authentication Setting Procedure
Introduction
This setting example explains the procedure of 802.1X port based authentication setting for switches.
Applicable models
| Applicable models | |
|---|---|
| Product name | Product number |
| Switch-M24PWR | PN23249K |
| Switch-M16PWR | PN23169K |
| Switch-M12PWR | PN23129K |
Overview
Using a switch as an authenticator, authenticate the supplicant PC to connect to the network.
Configuration Example

Overall setting flow
- 1. Set Switch-M24PWR.
- 1) Set the IP address to 192.168.1.254/24.
- 2) Enable the 802.1X port based authentication function on port 1, and set the RADIUS server (IP address = 192.168.1.1, shared key=shared_key).
- 2. Connect Switch-M24PWR with terminal and RADIUS server as shown in the configuration diagram.
- 3. Confirm that the supplicant PC is authenticated and communication becomes available.
Setting Procedure
Step 1.
Connect the PC and Ethernet switch using a twisted pair cable and console cable, and display the setting screen on Hyper terminal.
(Refer to Setting Example "Ethernet Switch Connection Procedure to a Console Port" for the procedure to display the setting screen on the console port)
Step 2.
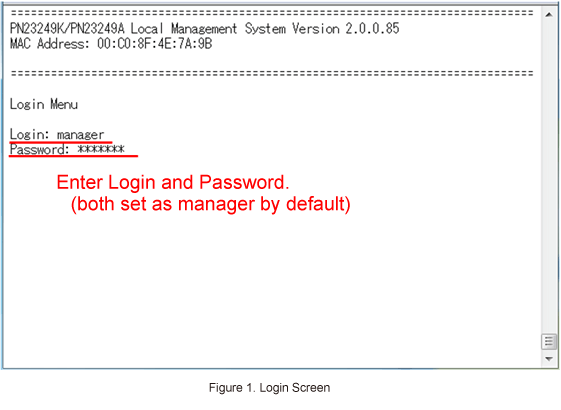
On the login screen, enter Login and Password (both set as manager by default), and login to the setting screen. (Refer to Figure 1)
Step 3.
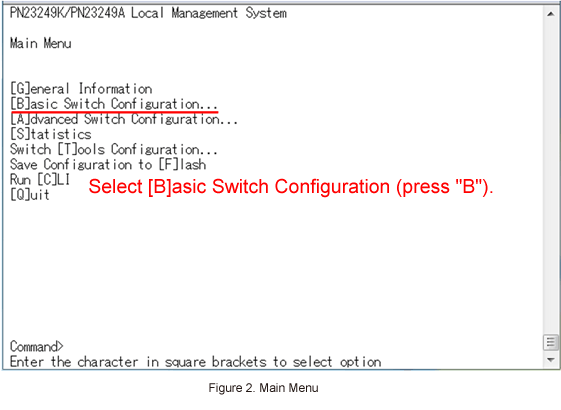
In Main Menu, select [B]asic Switch Configuration. (Refer to Figure 2)
Step 4.
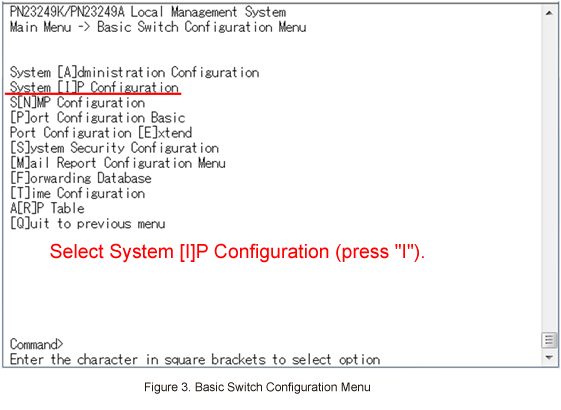
In Basic Switch Configuration Menu, select System [I]P Configuration. (Refer to Figure 3)
Step 5.
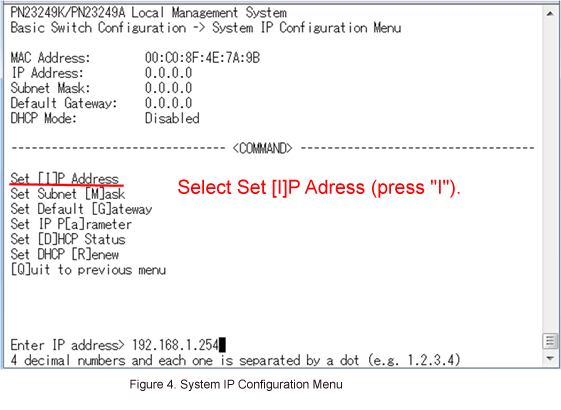
In System IP Configuration Menu, select Set [I]P Address and enter the IP address (192.168.1.254). (Refer to Figure 4)
Step 6.
In System IP Configuration Menu, select Set Subnet [M]ask and enter the subnet mask (255.255.255.0).
Step 7.
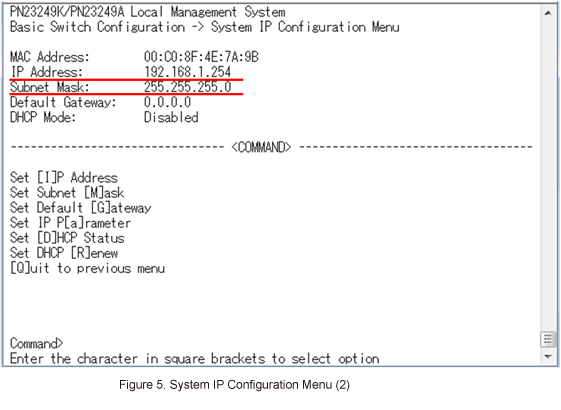
After performing all the settings, confirm that the settings are in the following status. (Refer to Figure 5)
Step 8.
In System IP Configuration Menu, select [Q]uit to previous menu to go back to Basic Switch Configuration Menu.
Step 9.
In Basic Switch Configuration Menu, select [Q]uit to previous menu and go back to Main Menu.
Step 10.
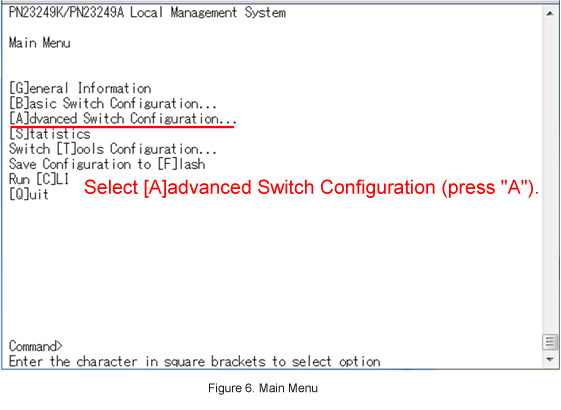
In Main Menu, select [A]dvanced Switch Configuration. (Refer to Figure 6)
Step 11.
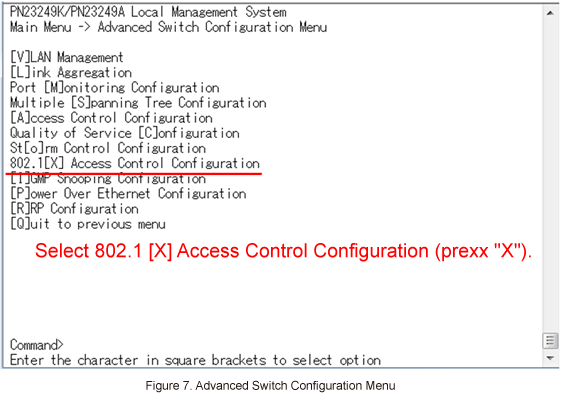
In Advanced Switch Configuration Menu, select 802.1[X] Access Control Configuration. (Refer to Figure 7)
Step 12.
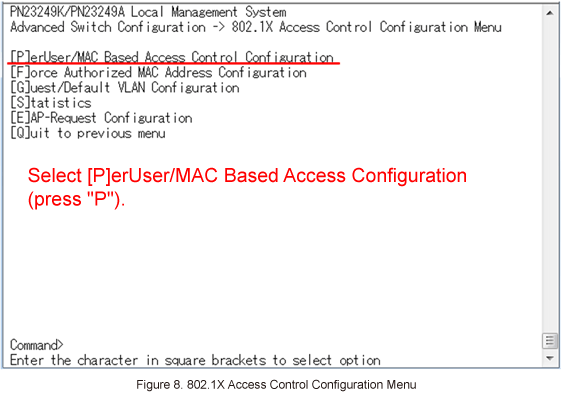
In 802.1X Access Control Configuration Menu, select [P]erUser/MAC Based Access Control Configuration. (Refer to Figure 8)
* For models only supporting Port Based Access Control, proceed to Step 13.
Step 13.
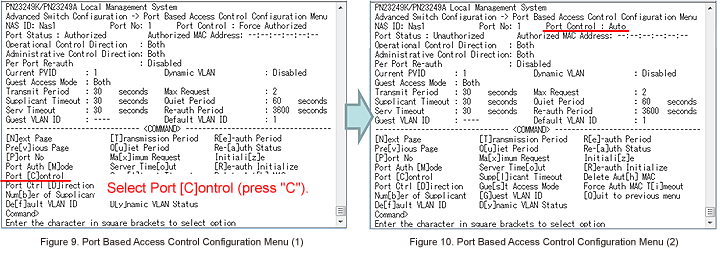
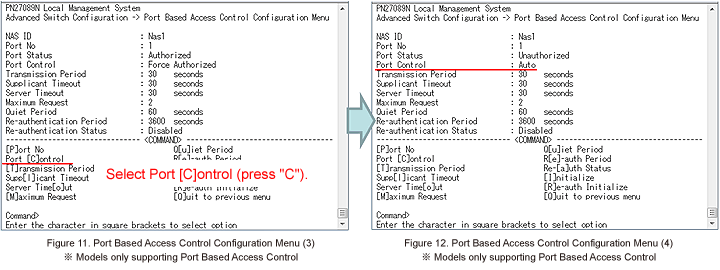
In Port Based Access Control Configuration Menu, select Port [C]ontrol, set Auto and confirm that the setting is changed.
- For models supporting MAC Based Access Control and Port Based Access Control (Refer to Figures 9 and 10)
- For models only supporting Port Based Access Control (Refer to Figures 11 and 12)
Step 14.
In Port Based Access Control Configuration Menu, select [Q]uit to previous menu to go back to 802.1X Access Control Configuration Menu. *For models only supporting Port Based Access Control, go back to Step 9.
Step 15.
In 802.1X Access Control Configuration Menu, select [Q]uit to previous menu to go back to Advanced Switch Configuration Menu.
Step 16.
In Advanced Switch Configuration Menu, select [Q]uit to previous menu to go back to Main Menu.
Step 17.
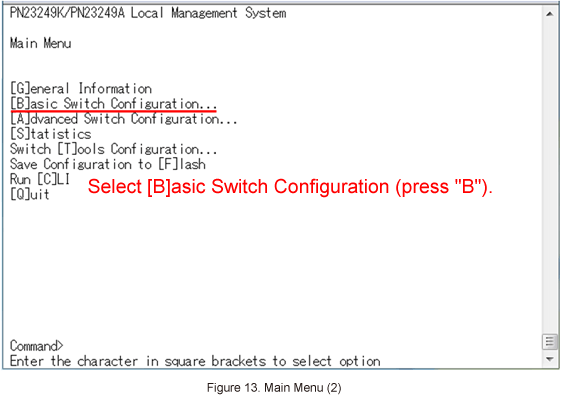
In Main Menu, select [B]asic Switch Configuration. (Refer to Figure 13)
Step 18.
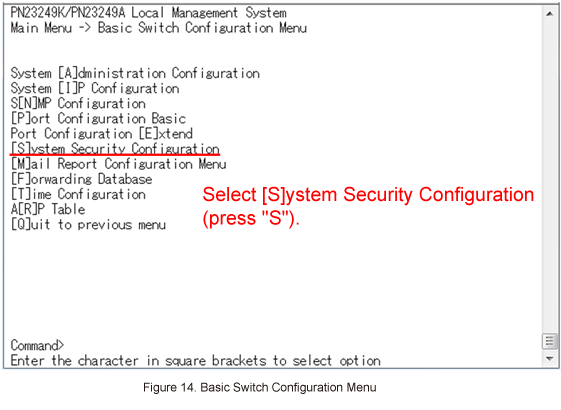
In Basic Switch Configuration Menu, select [S]ystem Security Configuration. (Refer to Figure 14)
Step 19.
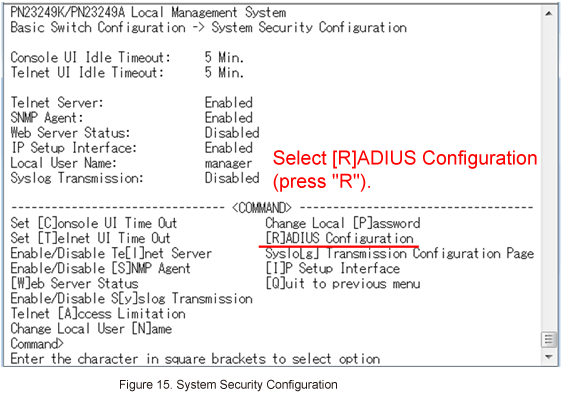
In System Security Configuration Menu, select [R]ADIUS Configuration. (Refer to Figure 15)
Step 20.
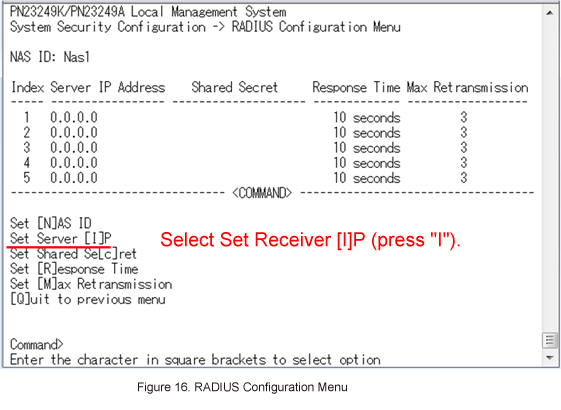
In RADIUS Configuration Menu, select Set Server [I]P and register IP address of the RADIUS server (192.168.1.1) to number 1. (Refer to Figure 16)
Step 21.
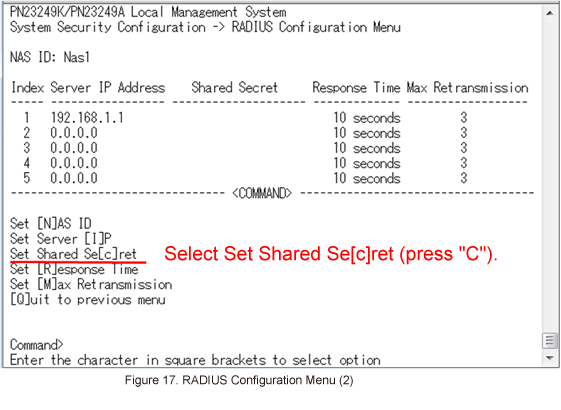
In RADIUS Configuration Menu, select Set Shared Se[c]ret and register a shared key (e.g. shared_key) to number 1. (Refer to Figure 17)
* Setting must be same as the RADIUS server.
Step 22.
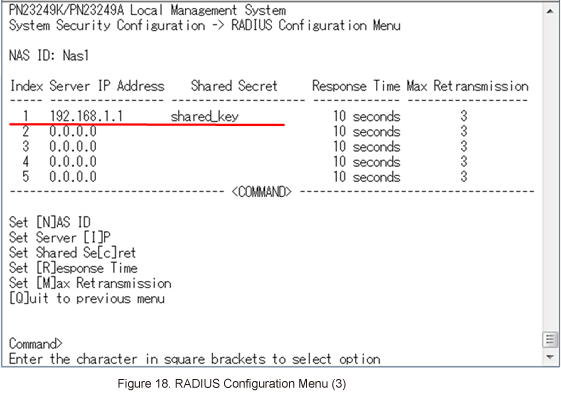
After performing all the settings, confirm that the settings are in the following status. (Refer to Figure 18)
Step 23.
After completing the settings, save the settings using Save Configuration to [F]lash.
Step 24.
Referring to the configuration diagram, connect Switch-M24PWR and the terminals to confirm that the supplicant PC is authenticated and communication is available.
ここからサブメニューです。