![]() Panasonic Electric Works Networks Co., Ltd. > Support > Setting Examples > Silent Fan Control Setting Procedure
Panasonic Electric Works Networks Co., Ltd. > Support > Setting Examples > Silent Fan Control Setting Procedure
ここから本文です。
Silent Fan Control Setting Procedure
Introduction
This setting example explains the procedure of the silent fan control setting for the Ethernet switch.
Applicable models
| Applicable models | |
|---|---|
| Product name | Product number |
| Switch-M48eG | PN28480K |
| Switch-M16PWR | PN23169K | Switch-M8ePWR | PN27089K |
Setting content and procedure
The following procedure changes the fan rotation speed to low speed by the silent fan control function of the Ethernet switch.

Overall setting flow
- 1. Change the fan rotation speed to low by the silent fan control function on the Ethernet switch.
- 2. Confirm that the fan rotation speed has changed to low by hearing the sound of the fan changed.
* By changing the fan rotation speed to low, the upper limit of the supplied power to the whole device or temperature for operation environment will be changed . Confirm it will not affect on the devices connected before conducting the settings. For details on the relationship between the fan rotation speed and the upper limit of the supplied power or temperature for operation environment, refer to the user manuals or other instructions on our website.
Setting Procedure
Step 1.
Connect the PC and Ethernet switch using a twisted pair cable and console cable, and display the setting screen on Hyper terminal.
(Refer to Setting Example "Ethernet Switch Connection Procedure to a Console Port" for the procedure to display the setting screen on the console port)
Step 2.
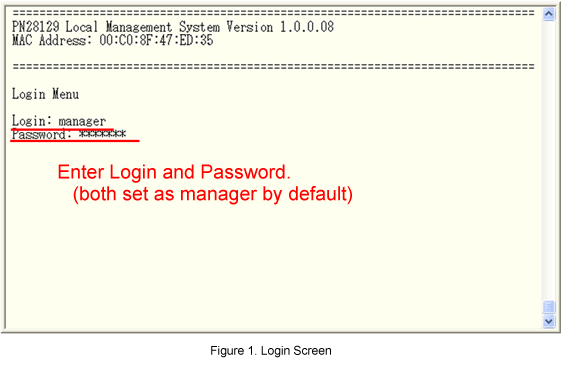
On the login screen, enter Login and Password (both set as manager by default), and login to the setting screen. (Refer to Figure 1)
Please note that the following steps vary depending on the model.
[For models with PoE function] Steps 3 to 9
[For models without PoE function] Steps 10 to 16
[For models with PoE function]
Step 3.
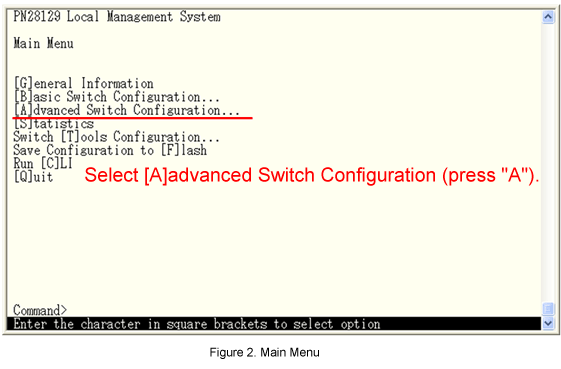
In Main Menu, select [A]dvanced Switch Configuration.(Refer to Figure 2)
Step 4.
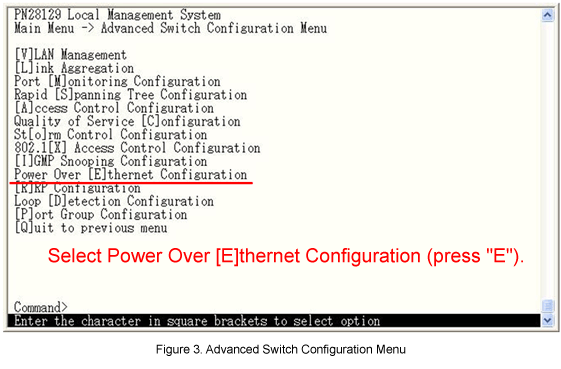
In Advanced Switch Configuration Menu, select Power Over [E]thernet Configuration. (Refer to Figure 3)
* For models without the port grouping function, select [P]ower Over [E]thernet Configuration.
Step 5.
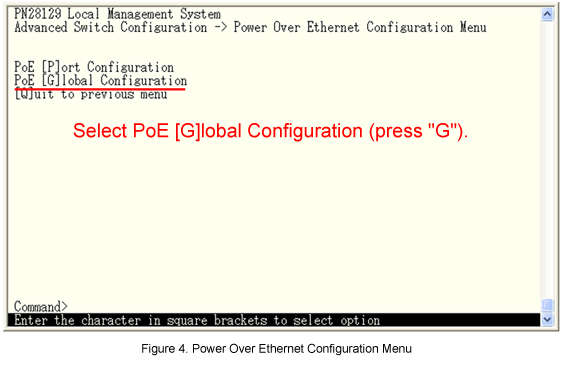
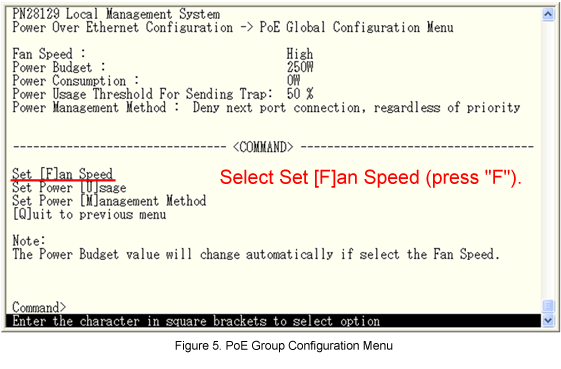
In Power Over Ethernet Configuration Menu, select PoE [G]lobal Configuration.
Step 6.
In PoE Global Configuration Menu, set the fan speed.Select Set [F]an Speed. (Refer to Figure 5)
Step 7.
A message similar to the one shown in Figure 6 will be displayed. Select 1 (Low). (Refer to Figure 6)
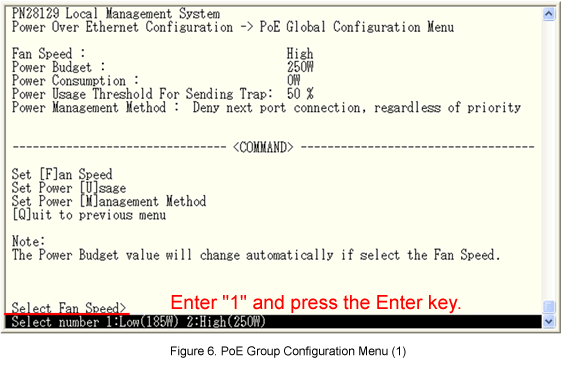
* Options for fan speed may vary depending on the model.
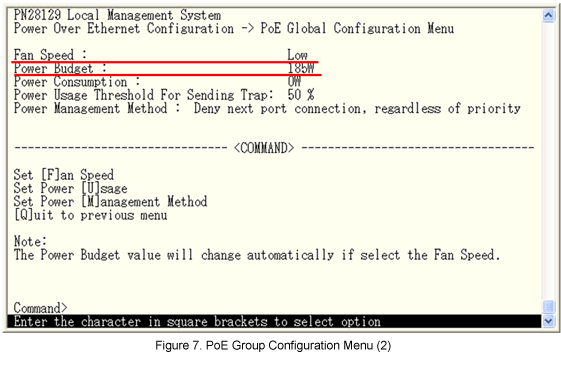
Step 8.
Confirm that the Fan Speed is changed from High to Low (see Figure 7), and noise of the fan become quieter. Confirm that upper limit of the power feed has been changed.
Step 9.
After completing the settings, save the settings using Save Configuration to [F]lash.
[For models without PoE function]
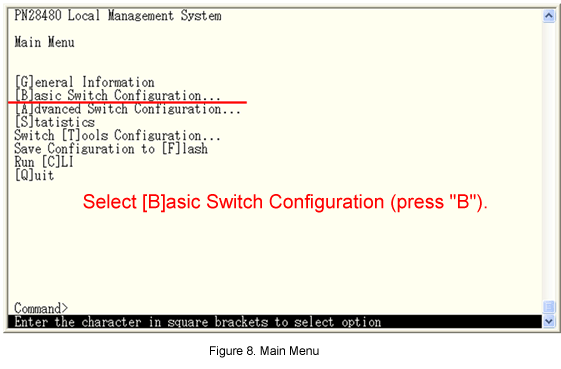
Step 10.
In Main Menu, select [B]asic Switch Configuration.(Refer to Figure 8)
Step 11.
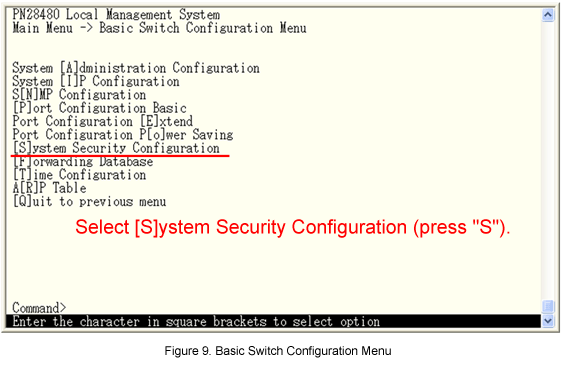
In Basic Switch Configuration Menu, select [S]ystem Security Configuration. (Refer to Figure 9)
Step 12.
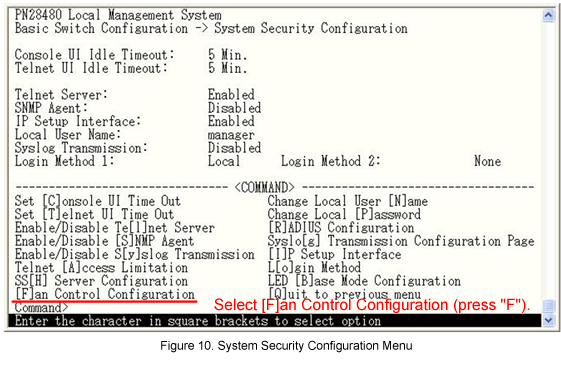
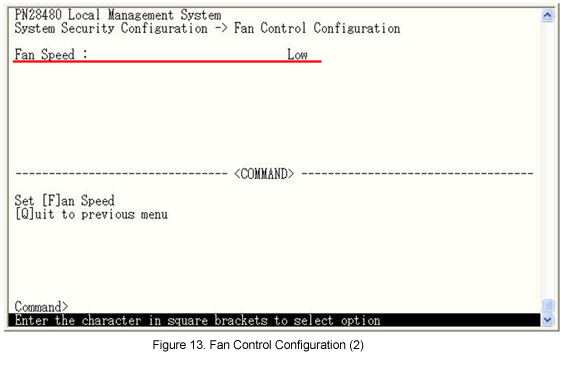
In System Security Configuration Menu, select [F]an Control Configuration. (Refer to Figure 10)
Step 13.
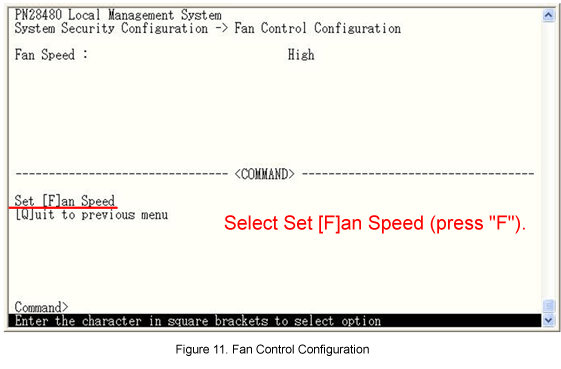
In Fan Control Configuration, set the fan speed.Select Set [F]an Speed. (Refer to Figure 11)
Step 14.
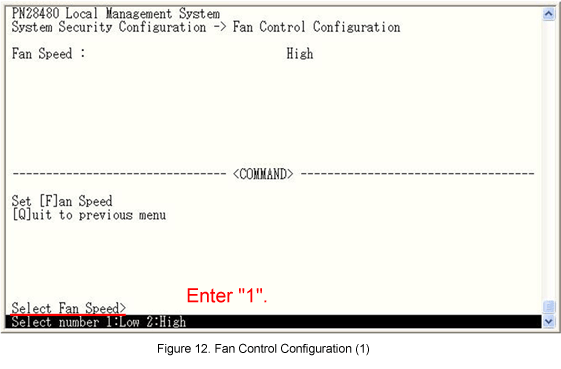
A message similar to one shown in Figure 12 will be displayed. Select 1 (Low). (Refer to Figure 12)
Step 15.
Confirm that the Fan Speed is changed from High to Low (see Figure 13), and noise of the fan becomes quieter.
Step 16.
After completing the settings, save the settings using Save Configuration to [F]lash.
ここからサブメニューです。