![]() Panasonic Electric Works Networks Co., Ltd. > Support > Setting Examples > Ethernet Switch BPDU Guard Setting Procedure (for WEB)
Panasonic Electric Works Networks Co., Ltd. > Support > Setting Examples > Ethernet Switch BPDU Guard Setting Procedure (for WEB)
ここから本文です。
Ethernet Switch BPDU Guard Setting Procedure (for WEB)
Introduction
This setting example explains the procedure of BPDU guard setting for WEB.
Applicable models
| Applicable models | |
|---|---|
| Product number | Product name |
| PN23249K | Switch-M24PWR |
| PN23169K | Switch-M16PWR |
| PN23129K | Switch-M12PWR |
Overview
This procedure shuts down the port while in loop connection and avoids the occurrence of storms using the BPDU packet sent while the spanning tree of the switch is enabled.
Configuration Example
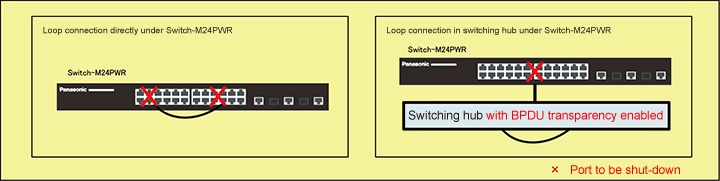
Setting Flow (cmmon to both Switch-M24PWR-1, Switch-M24PWR-2 and Switch-M24PWR-3)
- 1. Connect to the Web management screen of Switch-M24PWR.
- 2. Set Switch-M24PWR.
- 1) Enable the STP global setting.
- 2) Enable the BPDU guard function.
- 3) Connect the loop and confirm that the port shuts down.
Setting Procedure
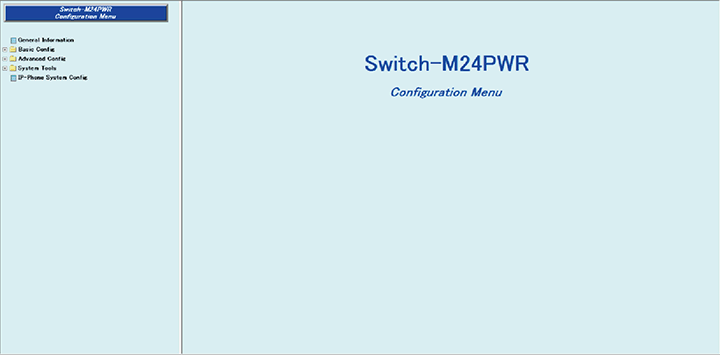
Step 1. Connect to the Web management screen of Switch-M24PWR and login.
Connect the PC and Ethernet Switch using a twisted pair cable, and connect to the Web management screen of Switch-M24PWR.
(Refer to setting example "Connection Procedures to Ethernet Switch Web Management Screen" for the procedure to connect to the Web management screen)
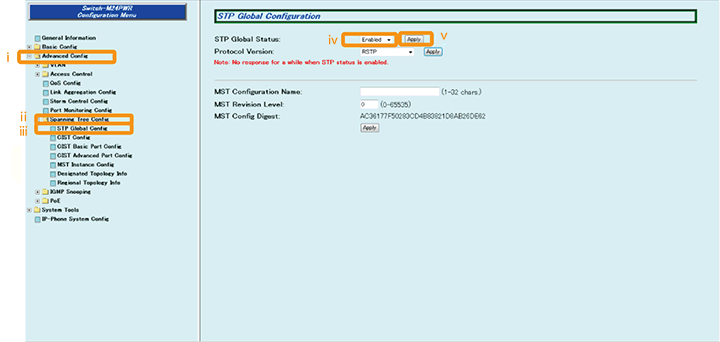
Step 2. Enable the STP global setting.
1) Select “Advanced Config” → ”Spanning Tree Config” → ”STP Global Config” (i → ii → iii).
2) Change “STP Global Status” to ”Enabled” (iv).
3) Apply the change by “Apply” (v).
* When the STP global status is enabled, the connection with the PC is disconnected for several tens of seconds. Reconnect the PC.
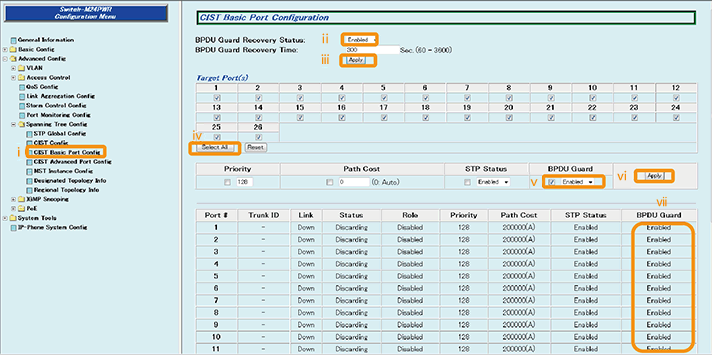
Step 3. Enable the BPDU guard function and the automatic recovery function.
1) Select “CIST Basic Port Config” (i).
2) Change “BPDU Guard Recovery Status” to “Enabled” (ii).
3) Apply the change by “Apply” (iii).
4) Select “Select All” (iv).
5) Change “BPDU Guard” to “Enabled” (v).
6) Apply the change by “Apply” (vi).
7) Confirm that “BPDU Guard“ is changed to “Enabled” (vii).
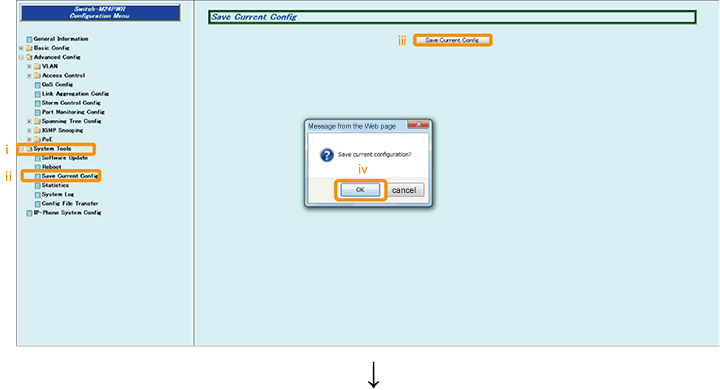
Step 4. Save the settings.
1) Select “System Tools”. → ”Save Current Config”(i → ii).
2) Save the settings by “Save Current Config”(iii).
3) Execute saving by “OK”(iv).
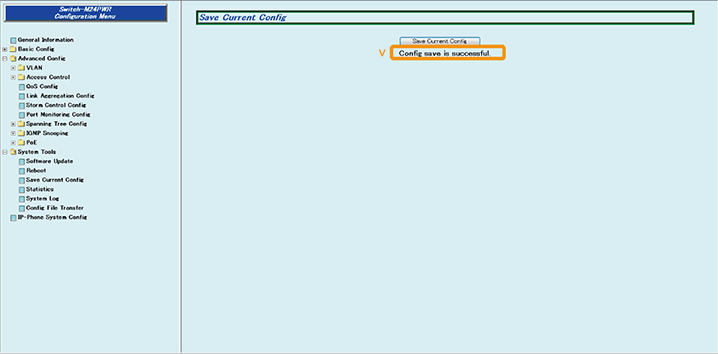
4) Confirm that the settings are saved successfully (v).
Step 5. Connect the devices.
Referring to the configuration example, connect the devices.
Step 6. Execute operation check.
Confirm that the port automatically shuts down when the loop is connected.
ここからサブメニューです。