 Panasonic Electric Works Networks Co., Ltd. > Support > Setting Examples > Web Console Initial Login Procedure(GA-MU/XG-MU Series)(for WEB)
ここから本文です。
Web Console Initial Login Procedure(GA-MU/XG-MU Series)(for WEB)
Introduction
In this setting example, we will explain the initial login procedure for the Web Console of the GA-MU/XG-MU series.
Applicable models
Overview
The Web server is a server function used to send and receive the HTTP protocol from devices connected to the network.
The Web server is enabled by default.
Configuration Example
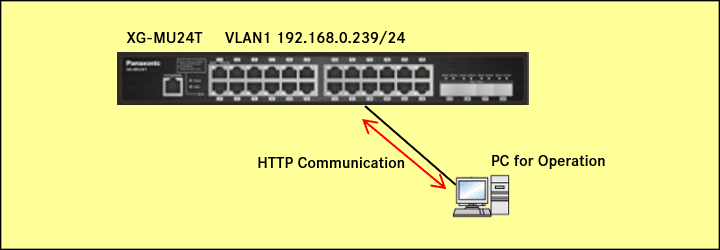
Explanation
Since the switching hub has the DHCP client function enabled by default, it can obtain an IP address from a DHCP server. However, in this configuration example, we will explain a login method that does not use a DHCP server.
Two minutes after the LAN port link comes up, the IP address 192.168.0.239/24 is automatically assigned, allowing access to the Web Console.
Setting Procedure
Step 1.
Connect the PC to the LAN port of the switching hub.
Step 2.
On the PC, launch a web browser (such as Edge), enter “192.168.0.239” in the address bar, and press the Enter key.
Note: It takes approximately 2 minutes after connecting the LAN cable for the login screen to appear.
Step 3.
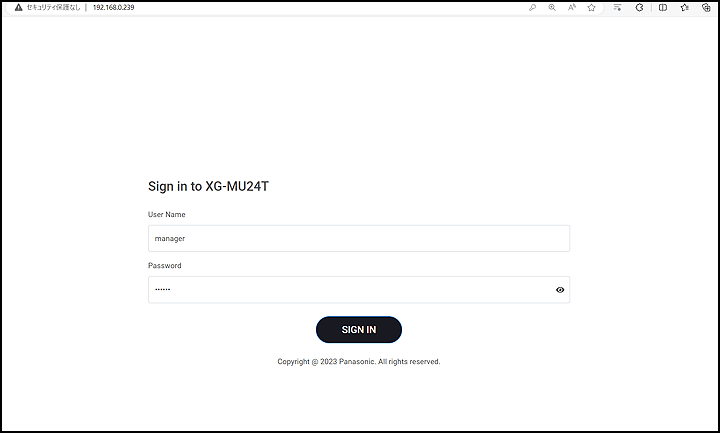
On the login screen, enter the User Name and Password to log in to the Web interface.
The default setting for the User Name/Password is [manager].
Step 4.
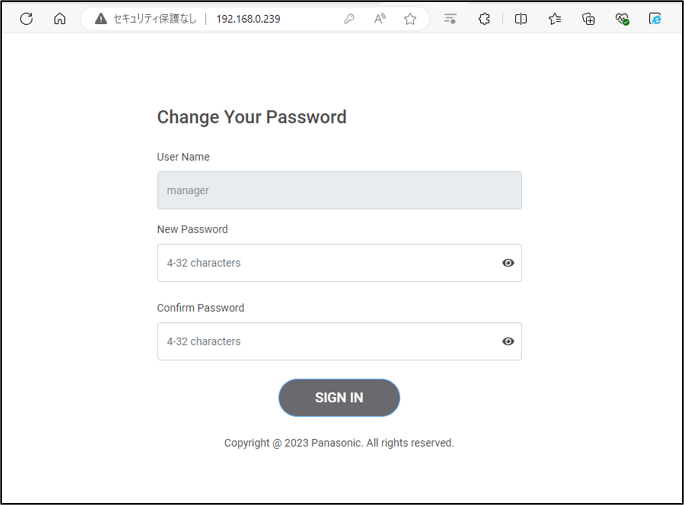
When logging in for the first time, you will be prompted to change the password.
Enter a new password.
The password must be set between 4 and 32 characters.
Note: The use of “manager” is not allowed.
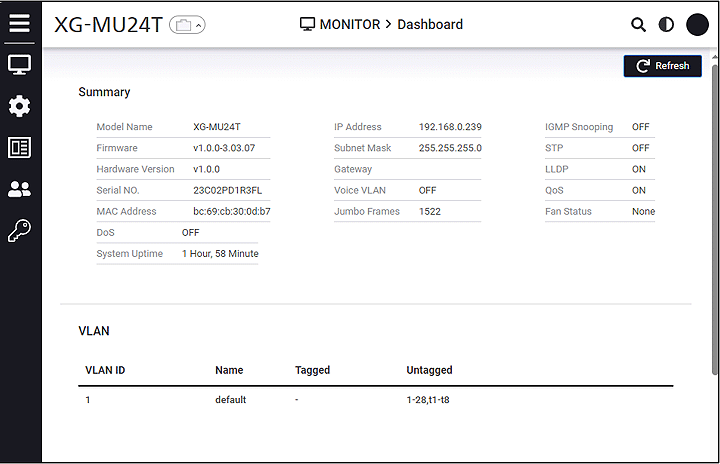
It transitions to the top page of the Web Console.
ここからサブメニューです。