 Panasonic Electric Works Networks Co., Ltd. > Support > Setting Examples > Firmware Update Procedure(GA-MU/XG-MU Series)(for WEB)
ここから本文です。
Firmware Update Procedure(GA-MU/XG-MU Series)(for WEB)
Introduction
In this setting example, we will explain the firmware update procedure for the GA-MU/XG-MU series.
Overview
The feature allows you to upgrade the switch firmware from a local PC using HTTP.
The Web server is enabled by default.
Configuration Example
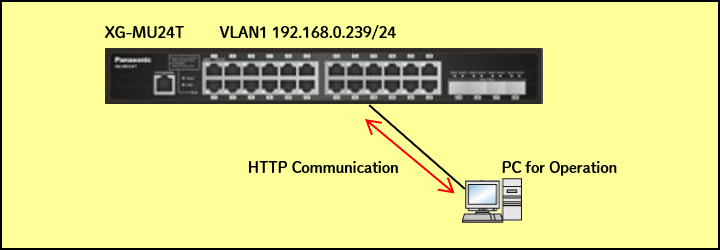
Explanation
- Download the firmware file stored on the local PC (PANASONIC_ZLP91089_1.0.0-2.03.17_20251216.rom) to the GA-MU8TPoE+.
- Specify the downloaded firmware as the startup image.
- When the system is rebooted, it starts up using the firmware specified as the startup image.
Since the switching hub has the DHCP client function enabled by default, it can obtain an IP address from a DHCP server. However, in this configuration example, we will explain a login method that does not use a DHCP server.
Two minutes after the LAN port link comes up, the IP address 192.168.0.239/24 is automatically assigned, allowing access to the Web Console.
Setting Procedure
Step 1.
Connect the PC to the LAN port of the switching hub.
Step 2.
On the PC, launch a web browser (such as Edge), enter “192.168.0.239” in the address bar, and press the Enter key.
Note: It takes approximately 2 minutes after connecting the LAN cable for the login screen to appear.
Step 3.
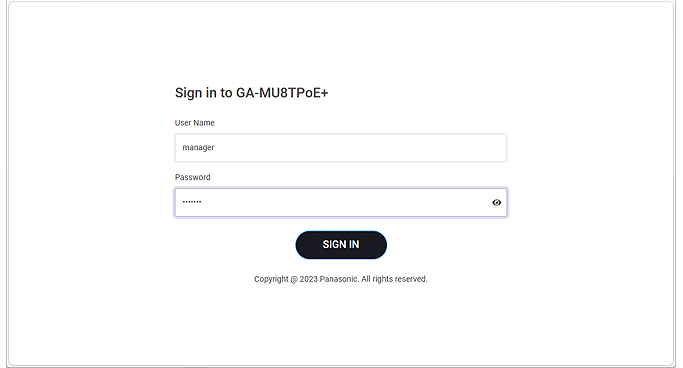
On the login screen, enter the User Name and Password to log in to the Web interface.
The default setting for the User Name/Password is [manager].
Step 4.
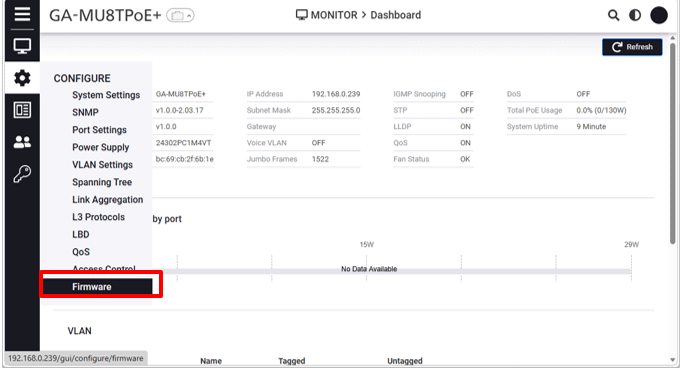
From the top page, navigate to the Firmware page.
Configure > Firmware
Step 5.
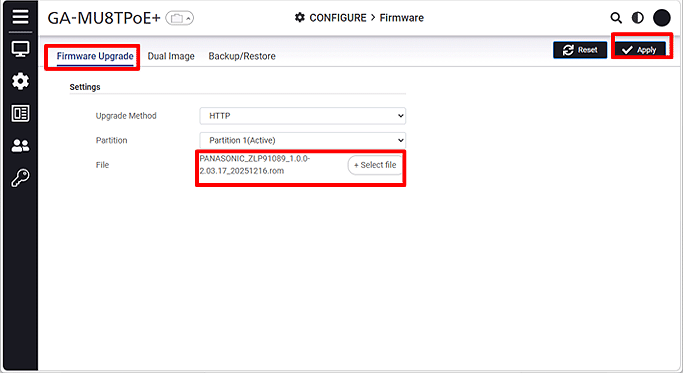
Select the file to be applied under Firmware Upgrade.
(Upgrade Method:HTTP + Select file:PANASONIC_ZLP91089_1.0.0-2.03.17_20251216.rom)
Step 6.
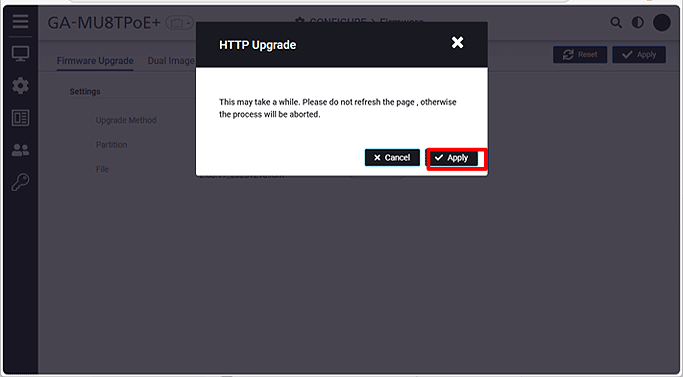
A firmware update confirmation dialog will be displayed. Click Apply and then reboot the device.
ここからサブメニューです。