ページの先頭です。
![]() Panasonic Electric Works Networks Co., Ltd. > Support > Setting Examples > Port Monitoring Setting Procedure
Panasonic Electric Works Networks Co., Ltd. > Support > Setting Examples > Port Monitoring Setting Procedure
ここから本文です。
Port Monitoring Setting Procedure
Introduction
This setting example explains the procedure of Port Monitoring Setting.
Applicable models
Overview
On your switch, perform port monitoring setting in order to monitor packets being transmitted and received on a port which is connected to the upper hub by copying these packets to another port.
Configuration Example

Overall setting flow
- 1. Set Switch-M24sG.
- 1) Specify ports to copy (Port 1) and to be copied (Port 24) and direction of communication to copy.
- 2) Enable Port Monitoring Setting.
- 2. Connect Switch-M24sG and the terminal as shown in the configuration diagram.
- 3. Confirm that packets transmitted and received on Port 24 of Switch-M24sG can be monitored from the monitoring PC.
Setting Procedure
Step 1.
Connect the PC and Ethernet Switch using a twisted pair cable and console cable, and display the setting screen on Hyper terminal.
(Refer to Setting Example "Ethernet Switch Connection Procedure to a Console Port" for the procedure to display the setting screen on the console port)
Step 2.
On the login screen, enter Login and Password (both set as manager by default), and login to the setting screen. (Refer to Figure 1)

Step 3.
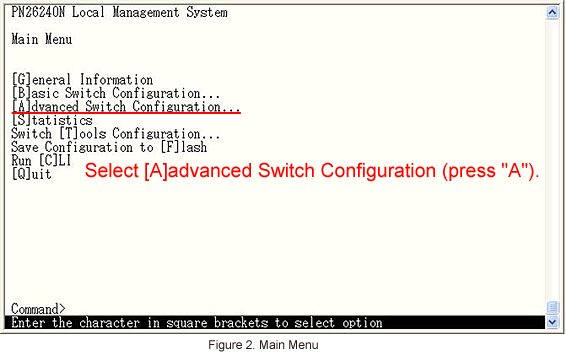
In Main Menu, select [A]dvanced Switch Configuration. (Refer to Figure 2)
Step 4.
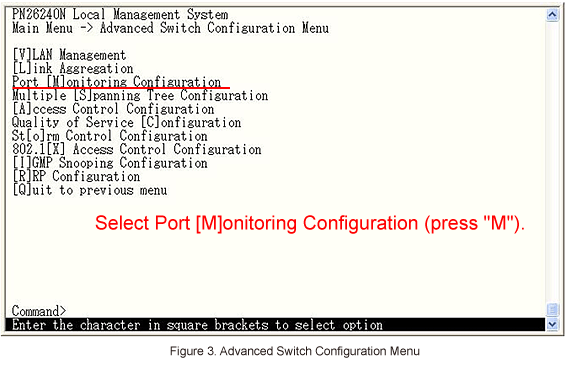
In Advanced Switch Configuration Menu, select Port [M]onitoring Configuration to perform Port Monitoring Setting.(Refer to Figure 3)
Step 5.
In Port Monitoring Configuration Menu, select Set Ports to be [M]onitored to specify the copy-source port (Port 24).(Refer to Figure 4)
* Since the target port is set to Port 1 and direction is set to incoming and outgoing (Both) by default, it is not necessary to change these settings in this setting example.

Step 6.
Then, select [C]hange Mirror Status to enable the monitoring function. (Refer to Figure 5)

Step 7.
After performing all the settings, confirm that the settings are in the following status. (Refer to Figure 6)

Step 8.
After completing the settings, save the settings using Save Configuration to [F]lash.
Step 9.
Referring to the configuration diagram, connect Switch-M24sG, upper Ethernet Switch and monitoring PC and confirm that packets transmitted and received on Port 24 of Switch-M24sG can be monitored from the monitoring PC.
* When transmitted (TX) packets are copied, VLAN tags are always added to them even if they are untagged packets.
To monitor packets being transmitted (TX), use a monitoring PC which can receive VLAN-tagged packets.
Management packets such as Ping and ARP packets transmitted from Switch-M24sG itself cannot be monitored.
ここからサブメニューです。
![]() Panasonic Electric Works Networks Co., Ltd. > Support > Setting Examples > DHCP Relay Setting Procedure (ZEQUO series)
Panasonic Electric Works Networks Co., Ltd. > Support > Setting Examples > DHCP Relay Setting Procedure (ZEQUO series)
![]()